Inter-Railing through Switzerland: Best Routes, Sights, and Tips 

What better way to experience Switzerland than all aboard a scenic snow-capped alpine train. If you’re thinking about planning an inter-railing trip in Switzerland, this guide covers everything you need to know: the best route, must-see destinations, planning tips, ticket info, packing lists, and insider advice to make the most of your journey. Whether you’re a first-time visitor or a seasoned traveller, this is your complete Switzerland inter-railing blueprint! 

Inter-railing through Switzerland - Zurich

Why Choose Switzerland for Inter-Railing? 

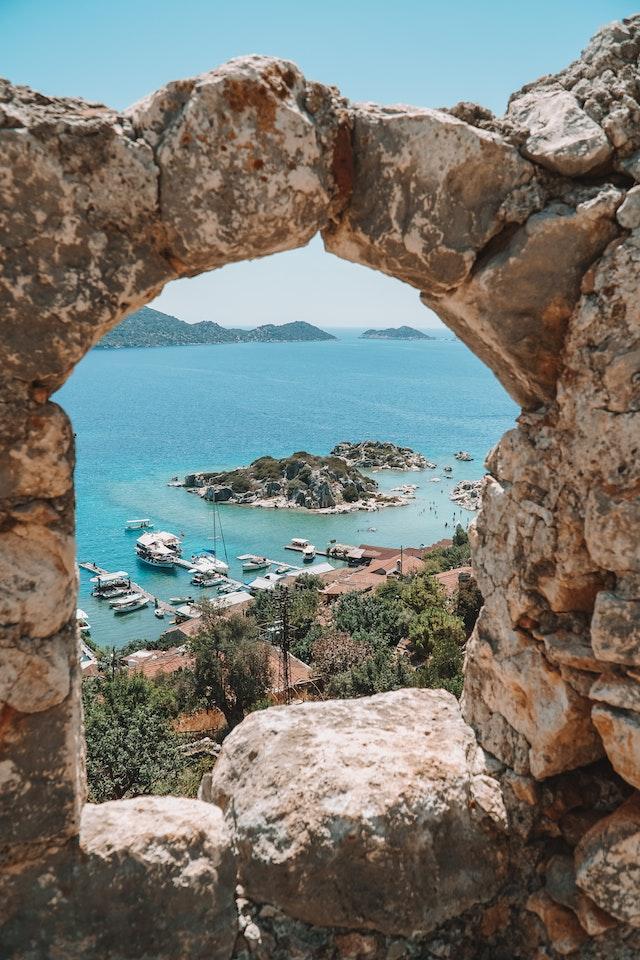
Switzerland boasts one of the most efficient and scenic railway networks globally, making it a top choice for inter-railing enthusiasts. From majestic alpine views to serene lakes and historic cities, travelling by train allows you to experience the country’s diverse beauty seamlessly. 

One of the things I found particularly magical about inter-railing in Switzerland was the ease of travel. You simply hop on a train and within an hour, the scenery completely transforms—from lakes to mountains to quaint villages. The punctuality and efficiency of Swiss trains make it stress-free, and best of all, you can sit back and enjoy the views without worrying about driving. If it’s your first time visiting Switzerland, this is hands down the best way to see the country! 

Planning Your Switzerland Inter-Railing Trip 

Selecting the Right Inter-rail Pass 

For unlimited travel within Switzerland, the Interrail Switzerland Pass is ideal. It offers: 

  • Flexible Travel Days: Choose from various options to suit your itinerary. 
  • Discounts on Scenic Trains: Benefit from reduced rates on renowned routes like the Glacier Express and Bernina Express. 
  • Youth, Senior, and Family Discounts: Available to cater to different age groups and family needs. 

Note: Prices start from €144.  

Switzerland Travel Passes: The Real Cost of Travelling

The real expense of inter-railing in Switzerland is the cost of individual train tickets. If you’re planning multiple journeys, I highly recommend getting one of the Swiss travel passes. There are several options available, but I found the 7-day Interrail Switzerland Pass to be the most cost-effective for me. 

What You Get: The pass includes unlimited travel on Swiss trains for the chosen number of days. It also comes with an internal map, ticket, and a travel diary (which is actually just a record of your journeys for the train conductor to stamp and validate). 

Where to Buy It: I purchased mine in person at my local ÖBB (Austrian train station), but you can also order it online. If you do buy it online, make sure you leave enough time for it to arrive—it takes a while! (Buy Here). 

How Many Days Should You Get? Be strategic! The pass is for the number of days you travel, not the number of days you are in Switzerland. Plan a few days where you don’t need a train and make sure you still have a valid pass for your return journey! 

Seat Reservations: Are They Necessary? 

While many Swiss trains don’t require reservations, some scenic and high-speed trains do. For instance: 

  • Glacier Express: Reservations are compulsory, with costs varying based on the journey length.  
  • Bernina Express: Reservations are recommended, especially during peak seasons. 

Always check individual train requirements in advance to ensure a smooth journey. 

Purchasing Tickets and Making Reservations 

Tickets and reservations can be made: 

  • Online: Through the Interrail website or SBB (Swiss Federal Railways) website. 
  • At Stations: Major train stations have ticket counters and machines for on-the-spot purchases. 
Inter-railing through Switzerland

Best Switzerland Inter-Railing Route: A 7-Day Itinerary 
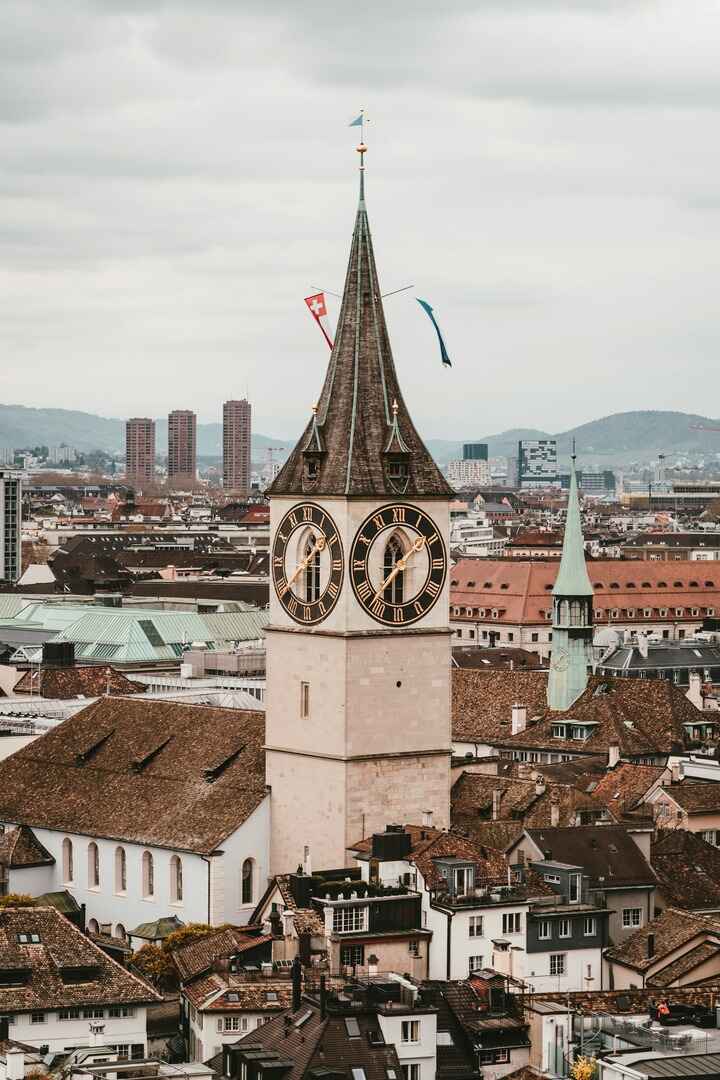
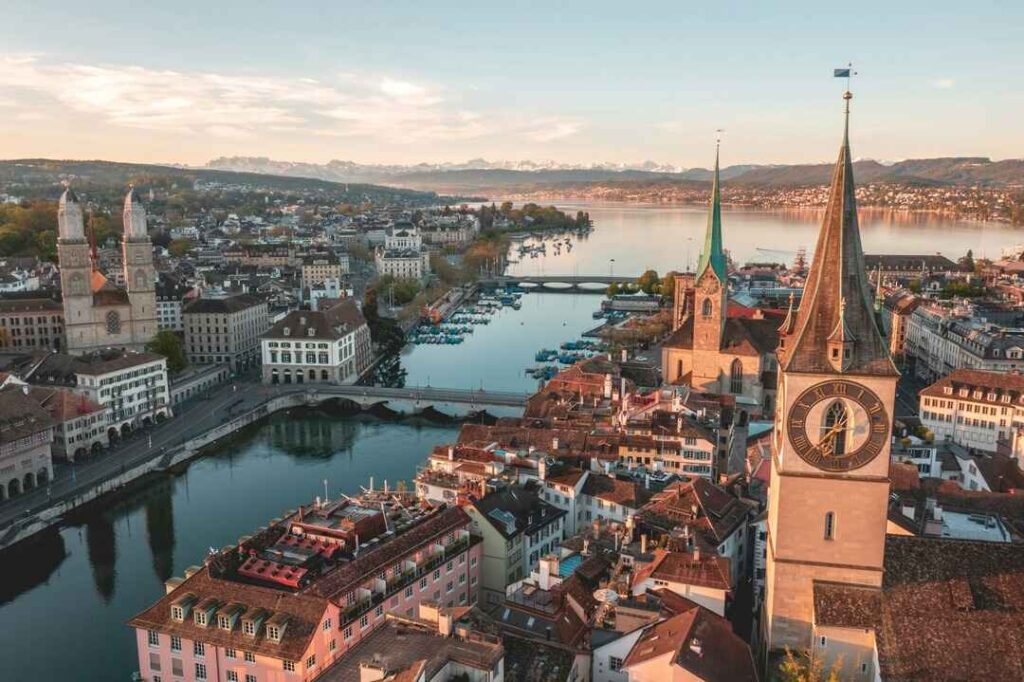
Zurich Switzerland clock tower

Day 1: Zurich 

Highlights

  • Old Town (Altstadt): Wander through narrow, winding streets rich in history. 
  • Lake Zurich: Enjoy a boat ride or a leisurely walk along the promenade. 
  • Bahnhofstrasse: Indulge in shopping on one of the world’s most exclusive streets. 
  • Lindenhof Hill: Offers one of the best panoramic views over the city. 

Scenic Tip: Sit on the right side when arriving from the north for panoramic city views. 
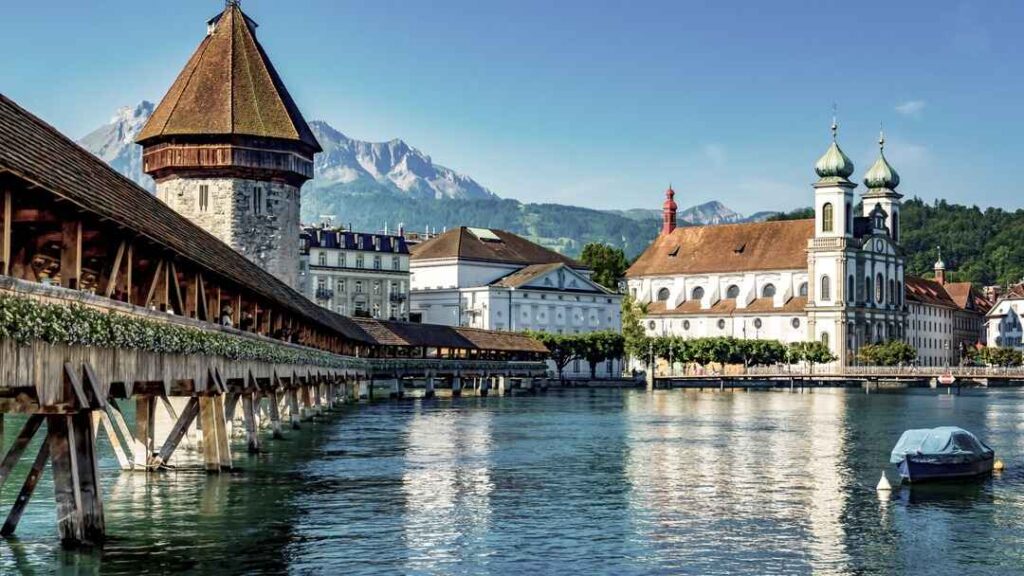
Day 2: Lucerne 

Highlights

  • Chapel Bridge (Kapellbrücke): One of Switzerland’s most iconic landmarks. 
  • Mount Pilatus or Mount Rigi: Take a cable car or cogwheel train for jaw-dropping views. 
  • Lake Lucerne Cruise: A peaceful boat ride showcasing the region’s stunning landscapes. 
  • Rosengart Collection: A must-visit for Picasso and modern art lovers. 

Scenic Tip: The journey from Zurich to Lucerne offers picturesque lake and mountain views; sit on the left side for the best experience. 
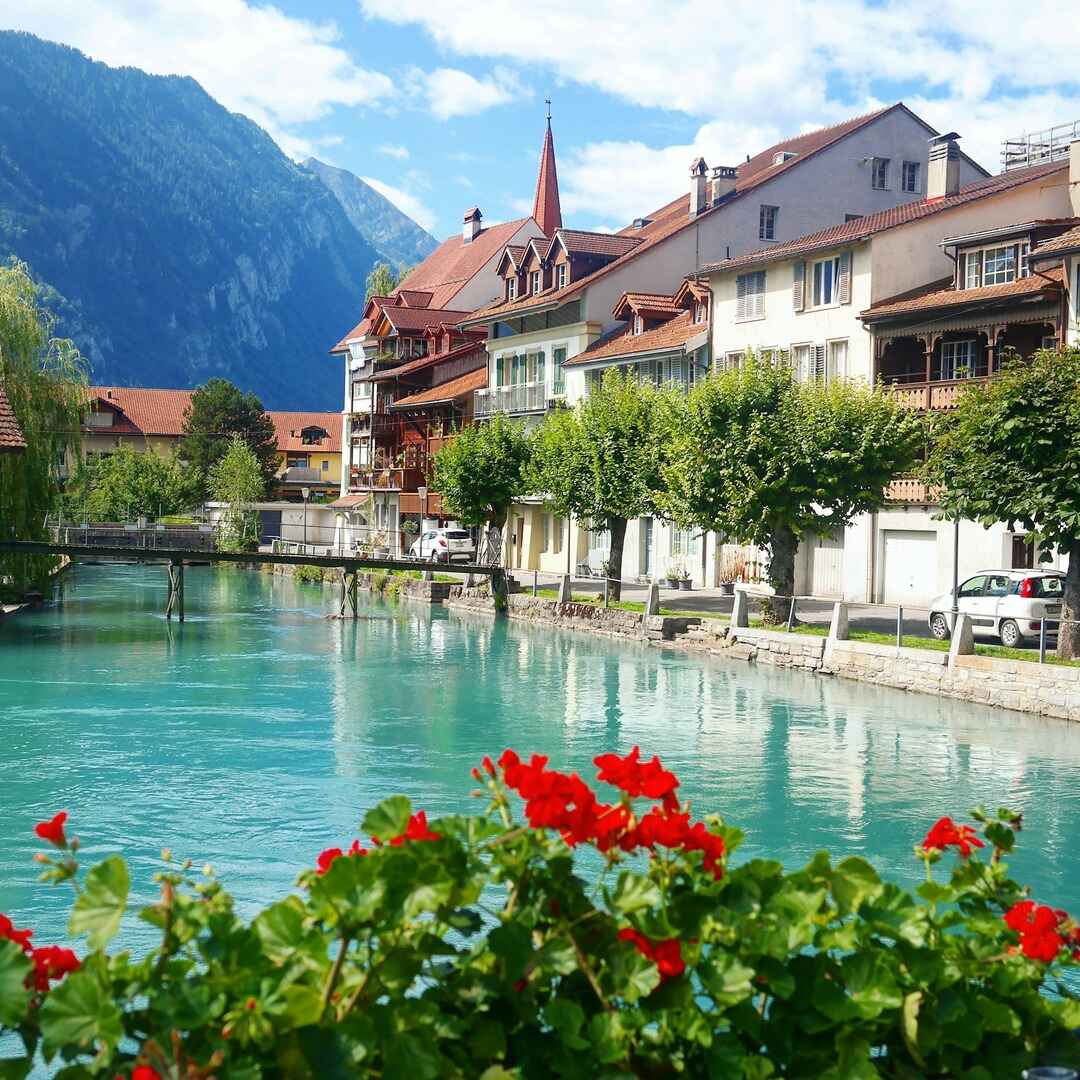
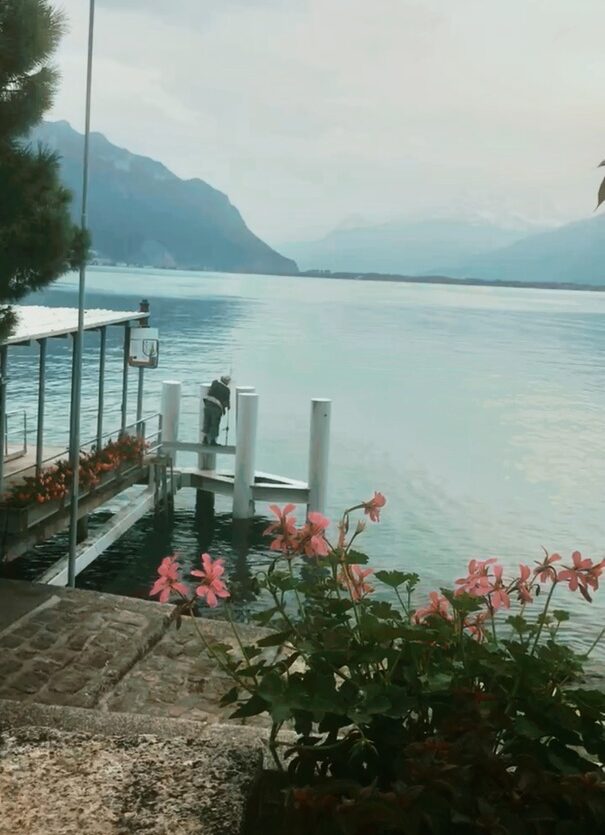
Inter-railing through Switzerland - Interlaken

Day 3: Interlaken 

Highlights

  • Harder Kulm: The best panoramic viewpoint over Interlaken. 
  • Lake Thun & Lake Brienz: Crystal-clear lakes perfect for boat trips. 
  • Adventure Sports: Try paragliding, canyoning, or skydiving! 
  • Schynige Platte: A nostalgic cogwheel train ride with spectacular hiking trails. 
  • Jungfraujoch (Top of Europe) 

Scenic Tip: Sit on the right side when travelling from Lucerne to Interlaken for views of Lake Brienz. 

Day 4: Bern & Geneva 

Bern Highlights

  • Old Town: A UNESCO World Heritage site with medieval architecture. 
  • Zytglogge: Witness the historic clock tower’s animated figures. 
  • Bear Park: Observe the city’s symbol, the Bernese bears, in a natural habitat. 

Scenic Tip: The train journey from Interlaken to Bern offers serene countryside views; both sides provide delightful scenes. 

Geneva Highlights: 

  • Jet d’Eau: The iconic water fountain in Lake Geneva. 
  • United Nations HQ: A must-visit for history and politics enthusiasts. 
  • Carouge: A charming district with Italian-inspired architecture and boutique cafés. 
  • Patek Philippe Museum: For luxury watch enthusiasts. 

Day 5: Montreux & Lausanne via Golden Pass Line 

Highlights

  • Chillon Castle: Explore the historic fortress on Lake Geneva’s shores. 
  • Montreux Jazz Festival: If visiting in July, experience world-class performances. 
  • Lakeside Promenade: Stroll amidst flowers, sculptures, and stunning lake views. 
  • Chillon Castle: A stunning medieval castle by Lake Geneva. 
  • Lavaux Vineyards: Take a wine-tasting tour with stunning lake views. 
  • Ouchy Promenade: A beautiful lakeside walk in Lausanne. 

Scenic Tip: The Golden Pass Line from Zweisimmen to Montreux is renowned for its beauty; sit on the right side for the best lake views. 
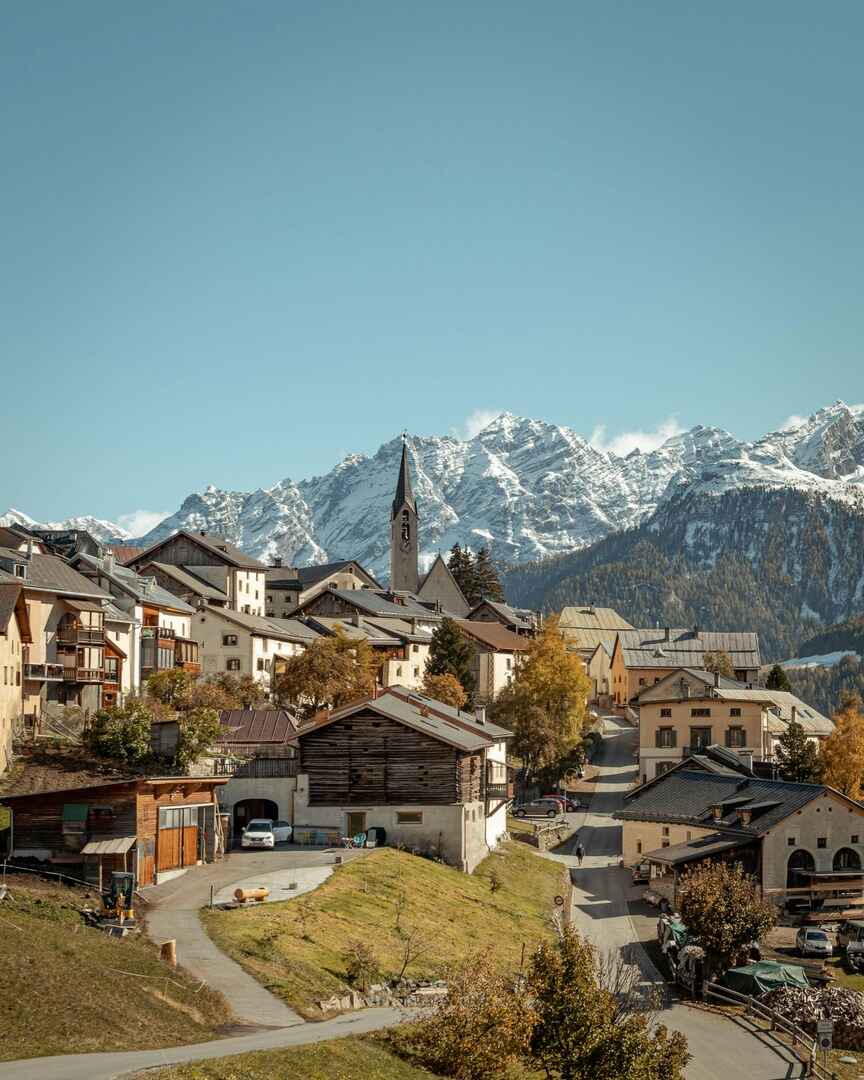
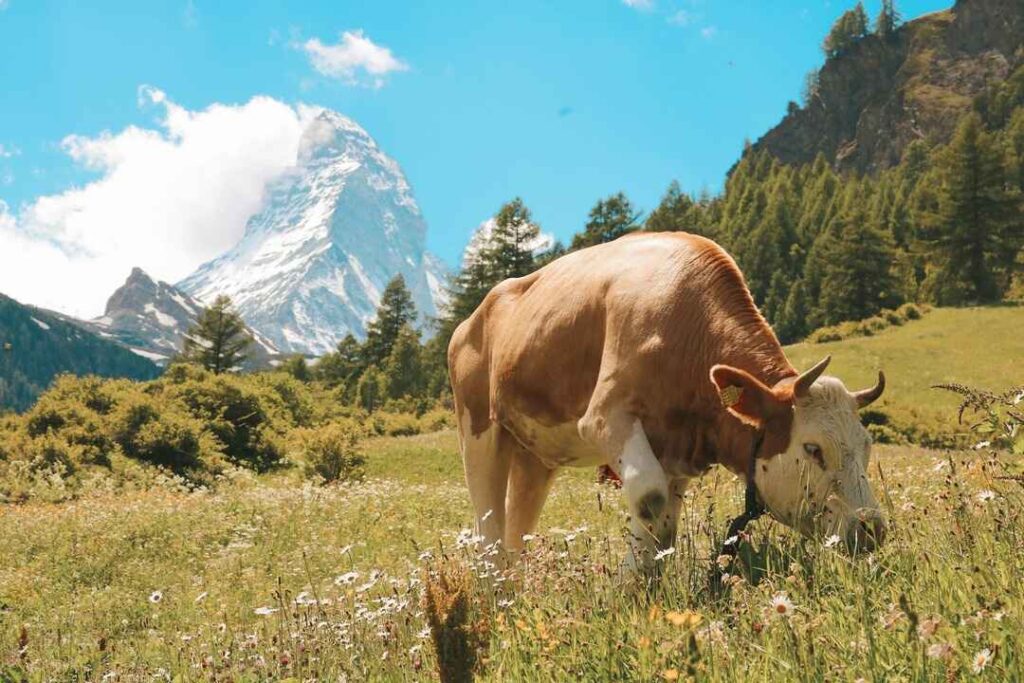
Day 6: Zermatt 

Highlights

  • Matterhorn: Marvel at the iconic mountain, especially from the Gornergrat Railway. 
  • Gornergrat Railway: Europe’s highest open-air cogwheel train offering panoramic views. 
  • Hiking Trails: Explore routes like the Five Lakes Walk. 

Scenic Tip: The journey from Montreux to Zermatt via Visp offers dramatic mountain landscapes; both sides are rewarding. 

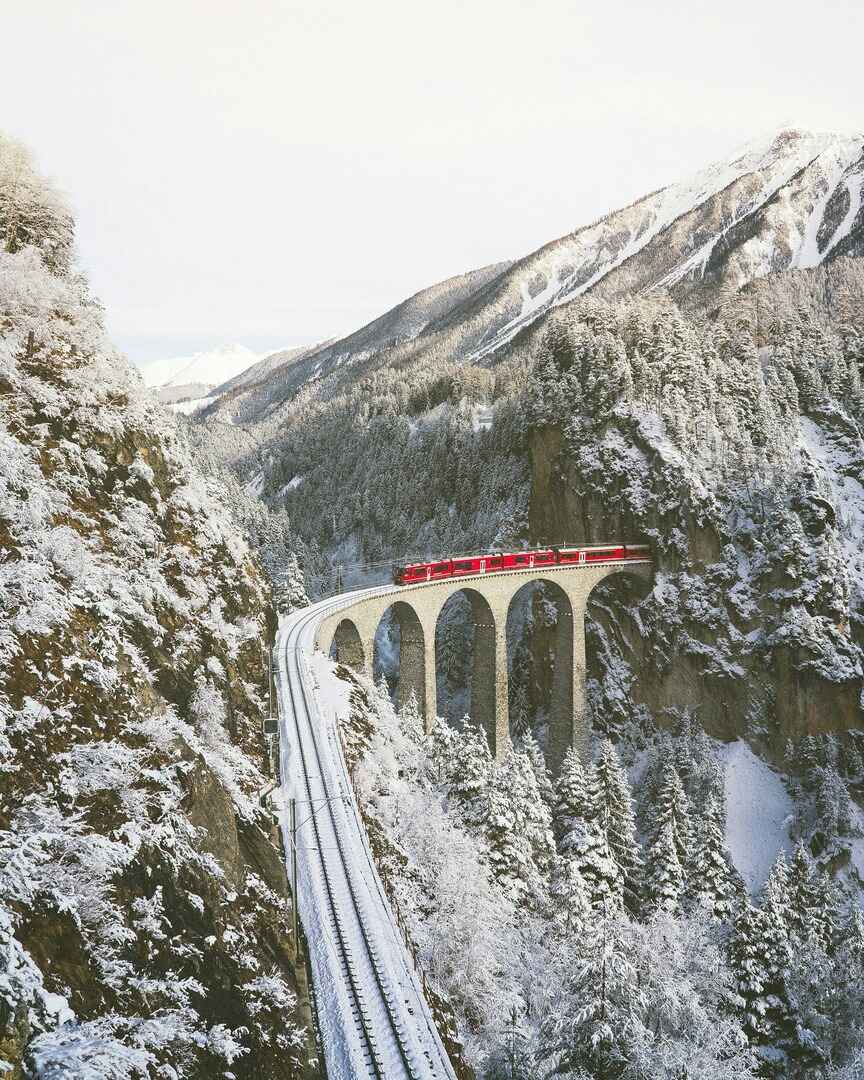
Day 7: Glacier Express to St. Moritz 

Highlights

  • Glacier Express: Dubbed the “slowest express train,” it traverses 291 bridges and 91 tunnels. 
  • Oberalp Pass: The highest point of the journey at 2,033 metres. 
  • Landwasser Viaduct: An architectural marvel and UNESCO World Heritage site. 

Scenic Tip: Reservations are mandatory; both sides offer exceptional views, but the left side provides a closer look at the Landwasser Viaduct. 

Note: While the Glacier Express is covered by the Interrail Pass, seat reservations are compulsory and come at an additional cost.  

Glacier express Switzerland

What to Pack on a Trip to Switzerland 

Switzerland may be small, but its weather can vary massively depending on where you are! The mountains are much colder than the cities, so packing the right gear is essential. 

  • Clothing: Layered outfits to accommodate varying climates; include a waterproof jacket and comfortable walking shoes. 
  • Swiss Franks: Switzerland doesn’t use the Euro! Make sure you purchase Swiss francs well in advance—many local post offices and banks don’t stock a large amount, so it’s better to be prepared. 
  • Travel Adapter: Switzerland has a different plug socket than the EU in regional areas. This was a nightmare for me to find last minute, so I recommend ordering one from Amazon before your trip. 
  • Electronics: Universal adaptor, portable charger, and camera. 
  • Documents: Interrail Pass, reservations, identification, and travel insurance.  

Final Tips to Enhance Your Switzerland Inter-Railing Experience 

  • Stay Connected: Download the Rail Planner App for offline timetables and station information. 
  • Early Reservations: Book accommodations and train reservations in advance, especially during peak seasons. 
  • Local Cuisine: Indulge in Swiss specialties like fondue, raclette, and chocolate. 
  • Weather Preparedness: Mountain weather can be unpredictable; always check forecasts and dress accordingly. 

Embarking on a Switzerland inter-railing journey promises unforgettable landscapes, effortless travel, and experiences that will stay with you for a lifetime. Plan well, travel smart, and enjoy the ride! 

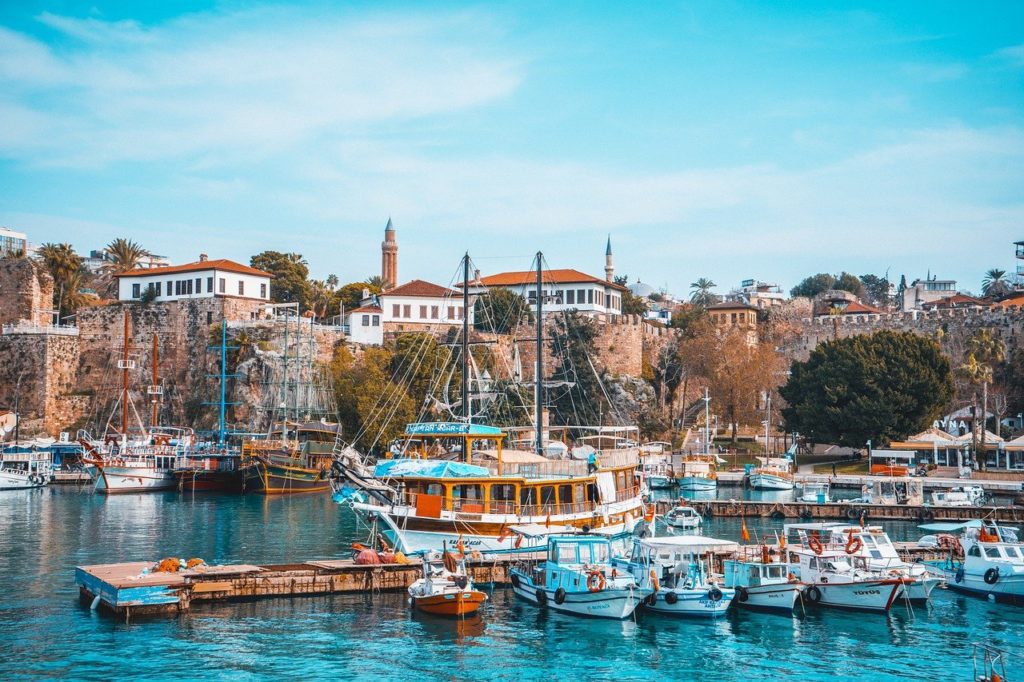
Planning a trip to Europe? Why not check some of my other posts: What to see in Paris, What to see in Santorini 

What to see in Venice in 2 days

Venice has made it to the top of many people’s bucket lists, with its romantic canals, old architecture and delicious food. And it’s not without good reason! Venice will always hold a special place in my heart so if it’s on the next agenda for you, you’re in for a treat! Read on to find out all the unmissable spots to visit!

Planning your trip:

One thing to be wary of is that the majority of hotels do not have direct access by boat. Instead, you will almost certainly have to carry your luggage across Venice and over many stepped bridges (steps rather than ramps), so try to pack as light as you can. This can, of course make it rather difficult if you’re taking a pram – so keep this in mind when planning your accommodation!

In terms of transport while you’re there, there are water taxis and water buses (no cars allowed in Venice!). Do remember to validate your ticket every time before entering the water bus (even if it’s already been “activated”). Failure to do so can lead to fines.

Now onto the fun part…


What to See in Venice – Day 1

We arrived in Venice early, dropped our bags off at the hotel (we stayed at Ca’Vendramin Zago) and headed down the Grand Canal which is about 3800m long to our first site: the Bridge of Sighs.

Bridge of Sighs:

The Bridge of Sighs (Ponte dei Sospiri) is one of the most famous bridges in Italy and gets its name from the fact prisoners originally had to cross the bridge “sighing” as they entered the jail.

Dorsoduro:

We carried on our walk until we reached Dorsoduro – one of the perfect spots for the classic photograph of Venice.

Piazzo San Marco (St Mark’s Square)

We then beaded to Piazza San Marco, one of the finest squares in the world and Venice’s top tourist attraction. There’s a variety of things to see here. Firstly there’s the Palazzo Ducale – this was originally where the Venetian government sat and now houses a museum dedicated to telling its history.

Then there’s the Basilica di San Marco and Companile (a bell tower which boasts some pretty impressive views), restaurants, shops and other museums. A real must is visiting Saint Mark’s basilica which has the most incredible interior. Unfortunately it was closed while we were there so we couldn’t go inside, but hopefully you’ll have better luck! Around this square there


San Giorgio Maggiore:

If you’re pushed for time and want the view that the Companile bell tower offers but don’t have time to queue for ages, it might be worth going to this church – you can get to the top quickly and have just as good a view of Venice!

Teatro la Fenice:

If you have time and are interested in Music it might be worth visiting the Teatro La Fenice (opera house) – we found it rather impressive when we peaked in!

Gondola ride 

Of course, no visit to Venice is complete without a ride on the famous Venetian gondolas. But it’s certainly not cheap – at 80 euros a ride it doesn’t always seem like an affordable option for students. However, what my boyfriend and I decided to do was find another young couple to share the ride with, making the trip just 20 euros each. The gondolas are big enough that it didn’t feel crowded, and was a fun opportunity to meet other like-minded students.

Rialto bridge (Ponte di Rialto)

Finally we ended the day with a trip to Rialto bridge (which gets incredibly crowded but was bearable by the end of the day).


DAY 2: Trip to Burano

Our second and final day in Venice, we decided to spend the day visiting the famous island Burano. This meant taking a boat which dropped its passengers at Murano first and then headed to Burano. Since we were on a tight schedule we decided to give Murano a miss but I’m told it’s rather popular – especially to watch the famous glass-making.

Burano

Having arrived at Burano we headed to Rio di San Mauro where the classic “instagram shot” is often taken. But it’s worth exploring the whole island which is small but boasts beautiful colourful buildings as well as homemade Venetian lace. Burano ended up being the highlight of my trip – a true wonder and unlike anywhere else I’d ever been!


If you still have time:

If you are in the luxurious position of having longer in Venice here are a few extras you might want to see. Firstly there’s the Giardini Public in Castello, a beautiful garden, away from the crowds and hustle of the city, which is home to a statue of Garibaldi and hosts various festivals and events in the year. Then there’s the Palazzo Grimani, a Palazzo that is largely hidden from the public eye but boasts beautiful frescoes, sculptures and paintings.

I spoke about the two islands Murano and Burano which are the most popular, but others swear by Torcello – saying it’s far more enchanting. Here you can see the cathedral of Santa Maria Assunta and the Museo di Torcello as well as climbing up the cathedral’s bell tower for an aerial view of the island lagoon. Then if you still have time you can walk past the meadows to Taverna Tipica Veneziana before returning to the hustle of Venice.


Planning a trip to Europe? Why not check out some of my other guides: What to see in the Amalfi Coast

The Ultimate Guide of What to See in Barcelona

The perfect city for any occasion, Barcelona boasts some of the most enchanting architecture in Spain beside the jaw-dropping  coastline of the Mediterranean. Whether you’re after a romantic rendezvous, a girls “out on the town” weekend or a solo adventure, there’s something for everyone. So, read on and find out about all the unmissable spots here in Barcelona!

Planning your trip to Barcelona:

Currency: Euros

Transport: Barcelona–El Prat Airport is the closest to the city centre, so plan to fly here if you can. You can get around Barcelona pretty easily using public transport – just look for signs for the tram, metro or local buses! 

Accommodation: Hotels can be quite expensive in Barcelona if you want to be in the centre, so it’s worth looking on airbnb too if you’re travelling on a budget!

What to See in Barcelona – Day 1:

Our first day in Barcelona, we dropped our bags off at the airbnb and decided to go on a walk around the area, walking through the cultural spot of La Rambla to the twisting medieval lanes of Barcelona’s old Gothic quarter, stopping for lunch on the way. We then headed to Casa battlo (pictured below), the first of many of Gaudi’s masterpieces we were going to see on our trip. Interesting to note, this house is known as the house of bones or the house of the dragon to locals because of the way the balconies look like the jaws of a beast!


DAY 2 in Barcelona:

Parc de la Ciutadella:

We woke up early and headed straight to Parc de la Ciutadella, which is a beautiful scenic spot, and houses a zoo as well as the Catalan parliament. We took the L1 subway to Arc de Triomf and walked from there. After walking around the grounds we decided to hire one of the rowing boats to get the full experience and loved every minute of it. – perfect way to unwind

Arc de Triomf:

Next we headed to the Arc de Triomf (having passed by it to get there) and sat there with ice creams enjoying the view and watching the locals play football in the last remaining light.

DAY 3 in Barcelona:

La Sagrada Familia:

Our third day, we decided to visit the famous Cathedral of Barcelona – La Sagrada Familia. Which ended up being easier said than done! – Turning up without a ticket expecting to go straight through was perhaps rather naive of me. Nevertheless, after a long wait and scramble for the final tickets (you normally need to pre-book them) we managed to get in. This piece of magnificent architecture was Gaudi’s “all-consuming mission” and is still being built to this day (expected to be finished in 2026 – a whole century after Gaudi died!). 

Font Magica:

After our day at the cathedral, we went to do some shopping before heading to the Font Magica. This is a fountain located in the Montjuic neighbourhood of Barcelona, near the Placa d’Espanya. It takes place between every 30 mins Wednesday-Sunday 7.30-10;30pm and involves a light display, music and water acrobatics. Right by it is the four iconic columns which is quite a sight and if you go up the steps you have a lovely viewing point of both the columns and the fountain.


DAY 4:

Tibidabo church:

The Tibado mountain is the tallest peak in Barcelona and boasts some of the best views of the city. It also homes the iconic Tibidabo Cathedral del Sagrat Cor (Cathedral of the Sacred Heart), and an amusement park. The cathedral is free and the elevator to the top is just 2 Euros. To get here either take the metro line L7 from Placa Catalunya to Avenida Tibidabo or the Barcelona Bus Turistic which drops you off at the same point, where you can take the Tibidabo funicular. Alternatively, if you’re on a tight budget or just want the scenic journey, take the S1 or S2 to Peu del Funicular, change to Vallvidrera Funicular and afterwards continue on Bus 111 – you can do all of that on one normal metro ticket.

Opening times:

Do be aware that although the Cathedral closes at 10pm, the funicular closes earlier so make sure to get there by 7pm.

DAY 5:

Park Guell 

Our final day in Barcelona, we made sure to go to Park Guell – one of the top tourist attractions in Barcelona and for good reason. Park Guell was created in 1900 after a wealthy count bought a large chunk of hillside (!) and hired Gaudi to create a mini village underneath. Although the project was largely abandoned, the park still brings in millions of tourists every year. Do make sure you book your tickets in advance (I tried to go earlier in the week and got caught out and had to come back with pre-booked tickets!) To get to the park, take buses 24 or 92 which drop you off at the entrance of the park. 

Extras if you have Time

  • Carmel Bunkers – free stunning view of Barcelona! Great photo opportunity
  • National Museum of Art of Catalonia
  • Palau de la Musica Catalana
  • Museu Picasso (7.50 euros for students)
  • Platja de la Barceloneta
  • Platja de Sant Miquel
  • Platja de Sant Sabastia
  • El Poblenou Platges


Planning a trip to Europe? Why not check out one of my other guides: What to see in Munich, Guide to visiting Marrakech and How to Spend 2 weeks in Antalya

What’s the Currency in Antalya? All Your Travel Essentials

Heading on a trip to Antalya? Good choice, you’ve picked a beautiful spot! Antalya is the perfect Turkish destination for relaxing on the beach, enjoying historic sites and dipping your toes into Turkish culture. But before you pack your bags, there’s a handful of practical matters you’ll want to find out before you head on your way – including “what’s the currency in Antalya?”, what packing essentials you need and other practical considerations. So, without further ado let’s dive into the details and ensure you have all you need for your upcoming trip…

What's the currency in Antalya and other essential questions

CURRENCY IN ANTALYA

What’s the currency in Antalya?

The official currency in Antalya is the Turkish Lira (TRY) although many people end up taking Euros with them as its widely accepted throughout the city and often preferred by traders. So, which should you take? Turkish Lira or Euros?

What’s the best currency to use in Antalya: Turkish Lira or Euro? 

The age-old debate of whether to take Lira or Euro! This has to be one of the most frequent questions I get asked and in short it really comes down to preference. At the moment the Turkish Lira has a very favourable exchange rate, meaning if you’re changing your GBP into Lira, you’re going to get a lot more for your money then transferring from GBP to Euro. So, in that respect, it’s technically better to use Lira in Turkey. 

However, the main problem is that the local traders want to trade in Euros (so they can exchange it when the exchange rate is favourable and get more bang for their buck). Therefore, tourists arriving with lots of Lira can really struggle to get rid of the currency. Even if you’re able to pay for a few things in Lira, they’ll almost always give you Euros in change. Again, it only really pays off to get Lira if you’re actually able to use it all before you get back (you don’t really want to be exchanging back and forth). 

At the end of the day take what you feel most at ease with. When I ended up taking lots of Lira, I really regretted it because I just struggled to get rid of it and even had lira refused at some times. So, I ended up bringing Euros for shopping, tourist attractions hotels etc. and just keeping a very small amount of Lira for tips. If you’re unsure, it’s probably best to take a mixture of the two.

Is it better to exchange money in UK or Antalya?

If you’re choosing to convert your GBP to Turkish Lira, it’s generally better to do this upon your arrival in Antalya because local exchange offices and ATMs generally offer more competitive rates than in the UK. 

How to get Turkish Lira currency in Antalya:

Getting your hands on Turkish Lira is relatively straightforward in Antalya. Banks, exchange offices, and ATMs are scattered across the city, all with pretty favourable exchange rates. While most hotels also offer currency exchange services, it’s generally best to compare rates with those found in local businesses to ensure you’re getting the best deal and making the most of every Lira! (Again, if you’re choosing to bring Euros with you instead, you can do this before you arrive in Antalya, or use your left-over Euros from your last European trip)

  • Antalya Currency Exchange Offices: There are numerous currency exchange offices located throughout the city. Compare rates and choose a reputable exchange office to get the best value for your money.
  • ATMs: ATMs are widely available in Antalya, and many accept international debit and credit cards. However, be mindful of withdrawal fees and conversion rates that your bank may apply.
  • Banks: Banks in Antalya also offer currency exchange services. While their rates might be competitive, banks usually have fixed operating hours.
  • Hotels: Some hotels might offer currency exchange services, but their rates may not be as favourable as those at dedicated exchange offices.

TIPPING CULTURE & CURRENCY IN ANTALYA

Do you Tip in Antalya?  

Yes! It’s generally seen as a courteous way to express appreciation for exceptional service during your stay. 

How much do you tip in Antalya? 

Tipping in Antalya generally follows the 10-15% rule. For restaurants, rounding up the bill or leaving a small percentage of the total is customary. Similarly, tipping hotel staff, tour guides, and taxi drivers is a gracious gesture that’s welcomed with open arms.


WHAT ELSE TO PACK FOR A TRIP TO ANTALYA

Okay, so we’ve covered in detail what the currency in Antalya is, but what else do you need to pack on a trip to Antalya? Read on for all my top tips…

Do you need a travel adapter for Antalya?

Yes, Turkey uses the Type F power outlet, so don’t forget to pack that trusty travel adapter to keep your gadgets charged and ready to go.

How to dress when visiting Antalya

Antalya’s climate ranges from Mediterranean to subtropical, so pack your wardrobe with breathable fabrics, swimsuits, and comfortable footwear. For exploring historical sites or visiting places of worship, a modest outfit that covers shoulders and knees is advised as a sign of respect for the local culture (especially if you’re planning to visit any mosques during your visit) 

Antalya Packing List Essentials: 

  • Swimsuits
  • Comfortable footwear 
  • Type F Travel Adapter 
  • Cover-ups for historical sites and places of worship (shoulders and knees covered)
  • Hat 
  • Sunscreen 
  • Scarves for visiting Mosques 
  • Toilet paper (public toilets don’t always have toilet paper!) 

TRAVELLING TO ANTALYA FAQS

You’ve booked and planned, and now it’s time to address the FAQs that might have crossed your mind. Read on for my most frequently asked questions when visiting Antalya: 

Currency in Antalya - the lowdown

1. Is it safe to drink tap water in Antalya? 

While tap water is generally considered safe, sticking to bottled water for drinking is recommended, especially to avoid any potential stomach troubles!

2. What’s the time zone in Antalya?

Antalya operates on Eastern European Time (EET), UTC+3.

3. What’s the language spoken in Antalya?

Turkish is the official language, but you’ll find that English is spoken in most tourist areas.

4. Is Antalya Expensive to Visit? 

This really depends on what you’re planning to do, but generally no, Antalya is not known for being an expensive place to visit. And that’s mainly because Antalya is within the top 7% of the cheapest places to live! (meaning prices at local level are fairly cheap.) Nevertheless, Antalya is a tourist hub and if you want the best prices, you’ll need to bargain and haggle (Traders will inflate their prices for tourists)

5. What are the Best Things to do in Antalya? 


FINAL WORD: CURRENCY IN ANTALYA, PACKING & THINGS TO DO

And that’s it! Now that you’ve familiarised yourself with the local currency in Antalya, tipping customs, packing essentials and common queries, you’re well equipped to navigate your upcoming trip to Antalya with confidence. Whether you’re planning to explore historical sites, indulge in local cuisine or soak up the stunning coastal landscapes, you’ll have all you need to ensure a memorable and enjoyable trip to Antalya. Enjoy!

The Ultimate Guide Of What To See In Paris

The city of love, artistry and exquisite food, Paris never fails to delight. Sipping Rosé on the Parisian rooftops or taking midnight strolls across the Seine, there’s something for everyone in France’s iconic capital. So read on to find out what’s in store for you on your next trip to Paris!

Planning Your Trip

Currency: Euros Transport: There are many public transport links around the city, including to and from the airport and if you’re not walking it’s the most cost efficient way of getting around (with airport transfers for as little as €6) Credit Cards & Banks: All tourist areas have ATMS and accept credit card, but as with many European cities, it’s worth carrying cash for the few small retailers which don’t accept card!

What to Do

A Historic Stroll through Paris

Hotel des Invalides: One of the buildings that immediately stands out as you walk into the city (other than the Eiffel Tower that is) is Hotel des Invalides. It originally housed 4000 war veterans, but was raided by a mob right before the French Revolution. Today, it’s an incredibly impressive monument and well worth a visit! Alexander III bridge: From the Hotel des Invalides, take a leisurely stroll across the famous Alexander III bridge. Place de la Concorde: Continuing your walk, follow the river towards the Place de la Concorde stopping at the fountain to take pictures before returning back across the bridge, past the Petit- and Grand-Palais, past the Eiffel Tower and back to the beginning! Avenue des Champsee-Elysee: Today we decided to walk back over the Alexander III Bridge, getting a few photos on the way before making our way past the Petit Palais and followed our way up the Avenue des Champsee-Elysee, taking the time to do a bit of shopping while we were there. We stopped at Laduree (a famous French macaroon cafe) for lunch, bringing a box of sweet treats back with us to have in front of the Eiffel Tower one of the other days. Sainte-Chapelle + Notre Dame: We then made our way to Sainte-Chapelle and Notre Dame – which ended up being quite a walk! the street leading up to Notre Dame is filled with artists painting the famous site and we couldn’t help but buy a few paintings and posters ourselves. Sainte-Chapelle has the oldest stained glass in Paris and it really is mind-blowing to visit. And, of course, the view of Notre Dame beside the river is second to none, and a must-see when visiting Paris. Unfortunately we arrived too late to go inside (they close at 17:30) but I was so glad to have seen the outside at least (especially now the Notre Dame has sustained severe fire damage). Pont des Arts Bridge: Finally, before heading back we visited the famous Pont des Arts Bridge, known for all the padlocks lovers have fastened to its sides as a sign of love.

DAY 3 in Paris:

Eiffel Tower: We woke up early and headed straight for the Eiffel Tower, having heard queues were going to be long, but were pleasantly surprised not to have to wait long at all before getting to the top (this might have been because of the season – we did go in September). The view did not disappoint! Arc de Triomphe + Avenue des Champsee-Elysee: We then walked through the Avenue des Champsee-Elysee – this time to visit the Arc de Triomphe. Sacre Coer: Once we were satisfied (aka taken as many artsy pictures as possible without getting run over by ongoing traffic – the Arc de Triomphe is situated in the middle of a cross-section of 9 roads!), we made our way to the Basilica Sacre Coeur. The view from here is spectacular but it is a steep, long walk up so be prepared! (of course if you can’t manage the stairs there is a funicular which is included in your metro ticket if you have one). Drinks at at the 5* Raphael Hotel – Students, staying in an airbnb, we had been living off picnics and ready-meals in our one-room apartment but we wanted to splash out one evening and treat ourselves to a dinner venue at the 5* Raphael Hotel by the Arc de Triomphe. We couldn’t afford to have dinner there but we went for drinks! The hotel bar is an open-top sky garden bar that overlooks Paris and the Eiffel Tower. Each night, the Eiffel Tower sparkles for five minutes on the hour, so we were able to watch the light show while we had our drinks. It really was a beautiful evening Evening walk by the Seine: After our evening drinks we went on a late-night stroll from Arc de Triomphe to Le Louvre, where we stayed for a while looking at the famous pyramid away from all the normal crowds. The nightlife in Paris is really vibrant and we saw lots of young people hanging out by the river, as well as Jazz musicians playing on the bridge. It was a lovely atmosphere to walk back to.

DAY 4 in Paris:

Disneyland: Since it was my friend’s birthday today, we had decided to book a ticket to Disneyland and spend the day there. It was actually my first ever time visiting Disneyland Paris and although I’m not much of a rollercoaster-lover, I must say it really is a spectacular Parc, and something you must do at least once in your life. We made sure to get the cute Mickey Mouse Ears which we wore around with us and spent the day re-living our childhood dreams (including hugging Mickey Mouse of course). Getting there: It was fairly easy to get to – just a train journey away (one of the few times we actually had to use public transport) and with lots of helpful clear signposts as to where to go. No expensive taxis needed!

DAY 5 in Paris:

Chateau de Versailles: This has to be my highlight of the whole trip – walking through the Hall of Mirrors was really an irreplaceable moment in my life. In terms of getting there, it’s a 40 min train journey from the centre of Paris (just take the RER C5 to Versailles-Chateau-Rive-Gauche station). It’s recommended that you book your tickets in advance (on the chateau’s website) so you can walk straight in, but because of the time we went, we seemed to be fine just queuing when we got there. When you arrive you are greeted by a large grand golden gate, which is impressive enough, but the State rooms are something else entirely. The vast size of the palace and estate is extraordinary in itself but the intricacy of the interior is unimaginable and really what blew my mind.

Best Hike in Austria: Wolfsklamm in Stans

Want to step into a fairy-tale? Described as the “most beautiful gorge in Tyrol”, Wolfsklamm in Stans takes you on an enchanting journey past streams and waterfalls while you trek through the mountains.

Walking up narrow mountainous pathways with stunning views of the forests to walking beside powerful waterfalls, it was everything I’d seen in fairy-tales and more.

Wolfsklamm in Stans – a Brief History: 

This magnificent gorge was a result of millions of years of natural sculpting: the force of raging floodwaters cut into the mountain forming a narrow passage and for years people didn’t go inside for fear of its destructive force. Now, thousands of visitors come to hike at this very spot. 


Things to know before you go: 

  1. Check the trail is open – they close for winter because the pathways get too dangerous. On their site they say they are open from 1st May to 31st October from 9am to 4pm. 
  2. The Hike is listed as “moderate” difficulty and I’d definitely agree with that – there are some very steep and slippery parts and the wooden pathways get very wet and slippery even on a hot day. 
  3. There is an entry fee (to cover gorge maintenance) – 5 euros per adult and you must pay with cash. 
  4. They do have a car park if you are planning to arrive by car – take a look at their website for more details. 

2

How long does it take?

This is really up to you! On the hiking trail you go past a few different waterfalls, climb up parts of the mountain and get up close to some streams, so when you’ve had enough you can just go back. 

We decided to carry on for a couple of hours until we’d gone past all the waterfalls and reached a clearing. All in all, with the 30min trail journey from  Innsbruck to Stans and the lengthy walk to get from the station to the start of the hiking trail, it took us about 4 hours. But we did stop for lunch and to take pictures. (On their site it says it takes 3hrs)

How to start your hike:

  1. Take the bus/train to Stans (train timetable: https://fahrplan.oebb.at/webapp/) (or drive to the marked car park). 
  2. From there follow the lane marked “Oberdorf” and then “Unterforf” until you seen the welcome sign. 
  3. From here you’ll be able to buy your ticket and get a map to help you locate the hiking pathways. From then on, it’s rather self explanatory with carefully fenced pathways and bridges.